

How to Install Wood Look Tile
We have been working on Wood Look Tile Installation. If you follow us on Instagram (which you totally should😀! http://www.DIYTyler.com/instagram.html ) you will have already seen the finished product and some of the in work shots! We are in the process of putting an addition on our house and I have taken over the completion at this point and first up was to install wood grain look tile flooring in the new mudroom, laundry room and bathroom.
👕👕👕👕👕👕👕👕👕👕👕👕👕👕👕👕👕👕👕👕👕👕👕👕👕👕👕👕👕👕👕
Get your Shirt on!! http://bit.ly/DITylerMERCH
👕👕👕👕👕👕👕👕👕👕👕👕👕👕👕👕👕👕👕👕👕👕👕👕👕👕👕👕👕👕👕
Check out all the other Addition videos!: https://www.youtube.com/playlist?list=PLsk0VxaVqgZEG4H3IPW4rh0j3P_Z5b4OL
#tilefloor #woodlooktile #DITRA
➤We wanted the best and longest lasting solution we could and all my research pointed towards using a product called DITRA. It is an uncoupling, waterproof membrane that can be installed directly over OSB, laminate or plywood with no need for concrete backer board.
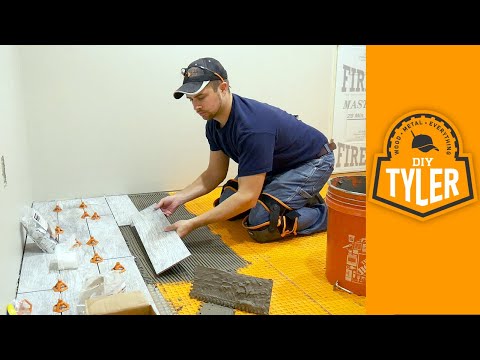
Started the install process by making sure there were no bumps or lips on the sub flooring using a belt sander with 40 grit sanding belt. Then mixed up 50lbs (at a time) of Schluter All-Set and spread it using a 3/16″ v groove trowel and laid the DITRA over it. You can proceed with tiling right over the DITRA immediately if you want, I first laid all the DITRA and them came back over the next few days and laid the tile.
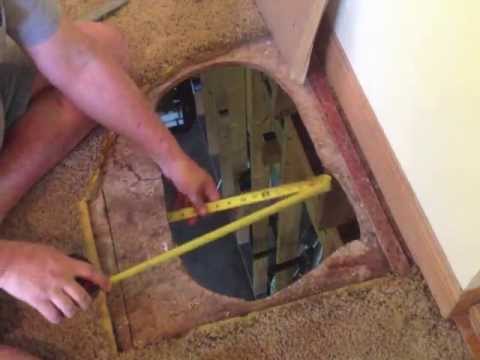
Laid the tile using a 1/3rds pattern making all the cuts on my RIDGID tile saw. You can probably use a scribe and break tool but you won’t be able to take sliver cuts if you need to. Laid the tile over All-Set spread using a 1/4×1/4 trowel and leveled them using the RIDGID level max system which was amazing.
OF NOTE: Usually you would have to lay the DITRA using a modified morter and the tile using an unmodified morter but the All-Set is specially formulated by Schluter to work for both applications.
Shout out to Schluter for sending us the DITRA and All-Set for use on this project. We wanted the best for our new addition and they came through for us! Check out their offerings:
https://www.schluter.com/schluter-us/en_US/
Big thanks to RIDGID for sponsoring our channel check out their latest power tool promotions!
https://www.ridgid.com/powertools/promotions/
➤Some tools I used (affiliate):
IsoTunes Xtra: https://amzn.to/2NBu7zw
RIDGID Level Max System: https://thd.co/2zznN2u
RIDGID Tile Tools: https://thd.co/2ABFQoi
Schluter Underlayment: https://amzn.to/2Rl61a1
Schluter All-Set: https://amzn.to/2Q2jNBL
RIDGID Cordless Belt Sander: https://amzn.to/2Q86YG3
EDC Belt Carry: http://goo.gl/XZnWRx
RevMarkers: https://goo.gl/UJZfnq


About The Author
You Might Be Interested In


Comment (0)
LEAVE YOUR COMMENT
You must be logged in to post a comment.
Question: which direction do you lay wood tile?
Parallel withe the longest wall or vertical?
Knock those off folling ur grout line.. will be alot easier
Two thumbs up for showing your daughter how to do this!!!! Great video
https://youtu.be/a16MYL2U8xA I know it may be too late for you to use the spinners but there is always good info here on YouTube.
He Tyler, are you supposed to tape the seams of the Ditra? I've seen that done in another vid.
Why in the world would you use grout and spacers?? Grout looks filthy very quickly especially on floors! No need to grout at all. There are plenty of videos using wood look porcelain tiles without the grout process which will leave you with a tighter cleaner finish,just saying.
Ha! Ha! Ditra tears the knees up!! Been there, knee pads are a must. Love your little apprentice, great job.
Would you need to use the orange part if you’re tiling over a cement foundation?
Beautiful
@DIYTyler what's the measurements to get your tile offset?