


BBQ FRAME & GRILL – My First Welding Project
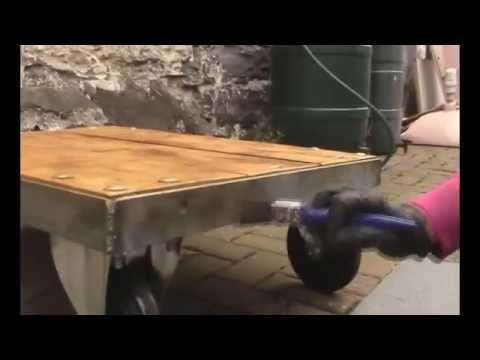
Today I show how I went about making the adjustable height BBQ frame and grill for the stone firepit. Part 2 will go in to the lifting mechanism detail and install. Welding tools and info below.
BASIC WELDING KIT
Sealey MightyMig Gasless Welder – https://amzn.to/3i4hU1X
Folding Table (if you can’t make your own yet!) – https://amzn.to/3eJUexQ
Auto Welding Helmet – https://amzn.to/38a32ui
Anti Spatter Spray – https://amzn.to/2Vqjl0J
Welding Magnets – https://amzn.to/2NFpnWY
Welding Clamp Set – https://amzn.to/2AbmBpz
Gloves/Gauntlets – https://amzn.to/3eHz4Am
SUPPORT THE CHANNEL
Our Patreon Page – https://www.patreon.com/restorationcouple
Buy a Restoration Couple Mug – http://www.restorationcouple.com/shop/
CONTACT US
restorationcouple@gmail.com
OUR SOCIAL NETWORKS
Facebook – https://www.facebook.com/restorationcouple
YouTube – https://www.youtube.com/therestorationcouple
Twitter – https://twitter.com/RestoCouple
Instagram – https://instagram.com/restorationcouple/
OUR BLOG
http://www.restorationcouple.com/
#firepit #diybbq #welding

About The Author
You Might Be Interested In


Comment (0)
LEAVE YOUR COMMENT
You must be logged in to post a comment.
Have to take my hat off to you Tim. For a FIRST TIME welding project that was brilliant. You have some guts my man!! Notice the beard's gone was that in case of FIRE???
Great work, impressive first weld project
Great little design …. especially as it was off the top of your head (All that scratching paid off then?) …. I thought those welds looked fine – better than Many 🙂
Patiently waiting on the next video
Good informative video., love this idea. Try pointing the head of the welder in the direction you are going at 45º angle. And use a tack weld. This way you can potentially avoid heat distortion .
Lol you gas flow is way to low..
It sparks a bit to much..
You didn't use a square? Does it wobble?
I love to see somebody join the wonderful world of welding. May you have much success and enjoyment with it!
How do you know if those round rods, which I guess are the grill, are a food-safe alloy of whatever kind of steel it is you got?